
Someone should package this better for end user "just works after Conda install" image generation, it is currently much more of a library setup.
Tested on Amazon EC2 on a g5.xlarge machine, which has an Nvidia A10G, using the AWS Deep Learning Base GPU AMI (Ubuntu 20.04) image.
First install Conda as per Section "Install Conda on Ubuntu", and then just follow the instructions from the README, notably the Reference sampling script section.This took about 2 minutes and generated 6 images under
git clone https://github.com/runwayml/stable-diffusion
cd stable-diffusion/
git checkout 08ab4d326c96854026c4eb3454cd3b02109ee982
conda env create -f environment.yaml
conda activate ldm
mkdir -p models/ldm/stable-diffusion-v1/
wget -O models/ldm/stable-diffusion-v1/model.ckpt https://huggingface.co/CompVis/stable-diffusion-v-1-4-original/resolve/main/sd-v1-4.ckpt
python scripts/txt2img.py --prompt "a photograph of an astronaut riding a horse" --plmsoutputs/txt2img-samples/samples, includining an image outputs/txt2img-samples/grid-0000.png which is a grid montage containing all the six images in one: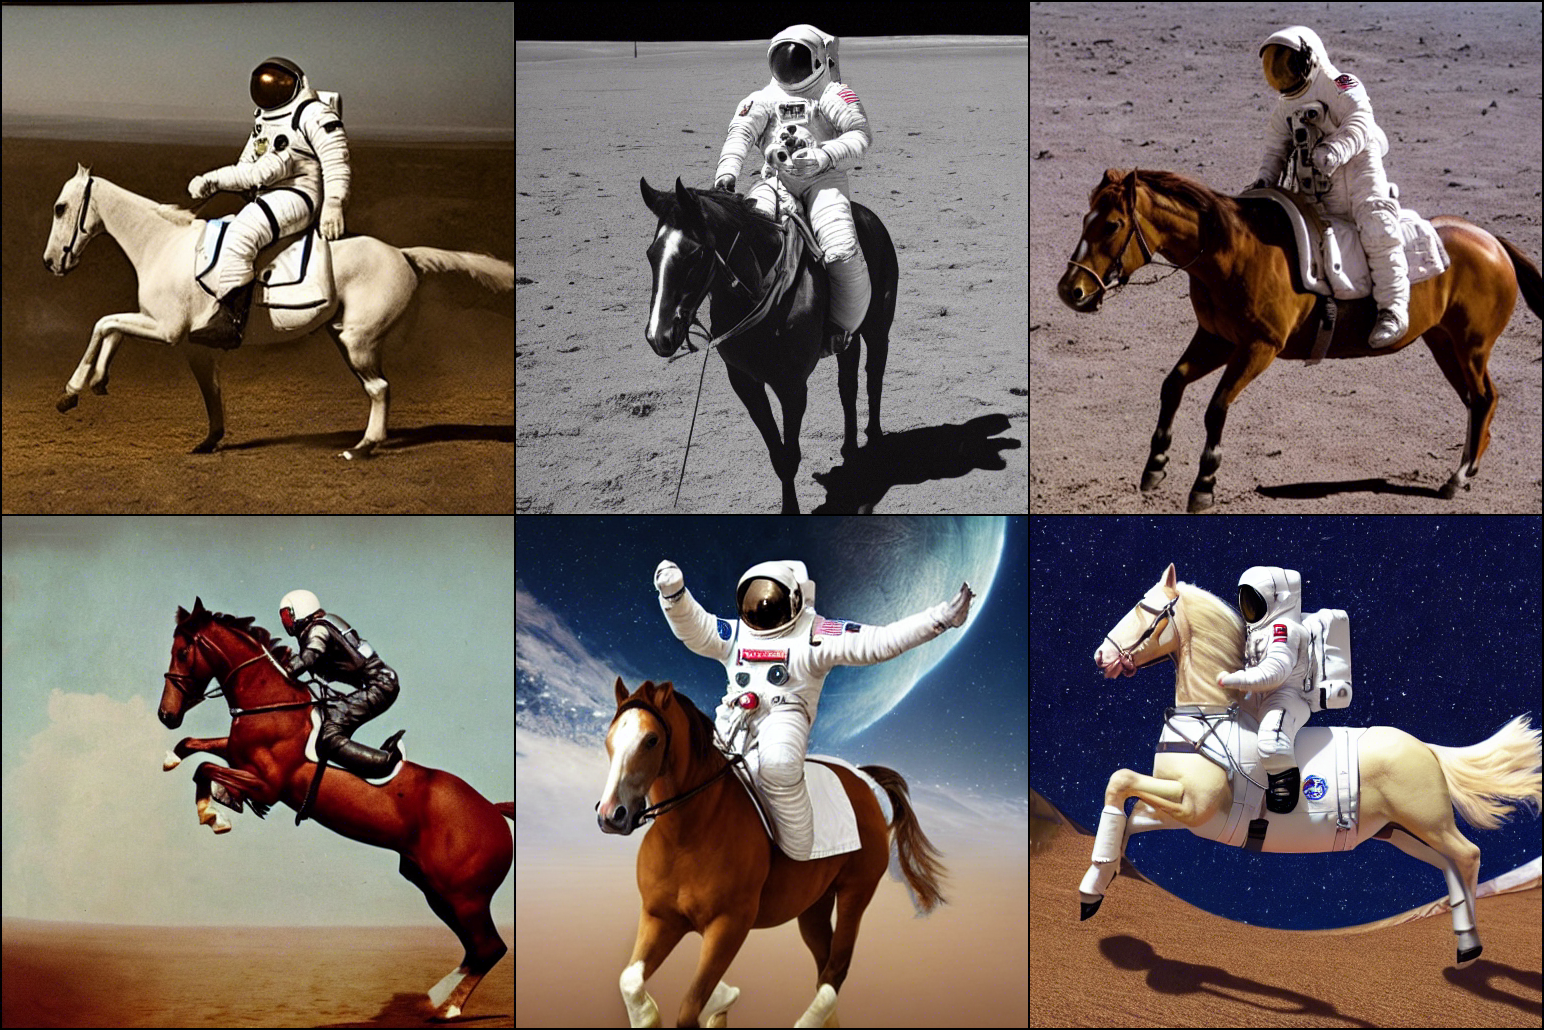
A quick attempt at removing their useless safety features (watermark and NSFW text filter) is:but that produced 4 black images and only two unfiltered ones. Also likely the lack of sexual training data makes its porn suck, and not in the good way.
diff --git a/scripts/txt2img.py b/scripts/txt2img.py
index 59c16a1..0b8ef25 100644
--- a/scripts/txt2img.py
+++ b/scripts/txt2img.py
@@ -87,10 +87,10 @@ def load_replacement(x):
 def check_safety(x_image):
     safety_checker_input = safety_feature_extractor(numpy_to_pil(x_image), return_tensors="pt")
     x_checked_image, has_nsfw_concept = safety_checker(images=x_image, clip_input=safety_checker_input.pixel_values)
-    assert x_checked_image.shape[0] == len(has_nsfw_concept)
-    for i in range(len(has_nsfw_concept)):
-        if has_nsfw_concept[i]:
-            x_checked_image[i] = load_replacement(x_checked_image[i])
+    #assert x_checked_image.shape[0] == len(has_nsfw_concept)
+    #for i in range(len(has_nsfw_concept)):
+    #    if has_nsfw_concept[i]:
+    #        x_checked_image[i] = load_replacement(x_checked_image[i])
     return x_checked_image, has_nsfw_concept


@@ -314,7 +314,7 @@ def main():
                             for x_sample in x_checked_image_torch:
                                 x_sample = 255. * rearrange(x_sample.cpu().numpy(), 'c h w -> h w c')
                                 img = Image.fromarray(x_sample.astype(np.uint8))
-                                img = put_watermark(img, wm_encoder)
+                                # img = put_watermark(img, wm_encoder)
                                 img.save(os.path.join(sample_path, f"{base_count:05}.png"))
base_count += 1This just works, but it is also so incredibly slow that it is useless (or at least the quality it reaches in the time we have patience to wait from), at least on any setup we've managed to try, including e.g. on an Nvidia A10G on a g5.xlarge. Running:would likely take hours to complete.
time imagine "a house in the forest"By default, LSF only sends you an email with the stdout and stderr included in it, and does not show or store anything locally.
One option to store things locally is to use:as documented at:
bsub -oo stdout.log -eo stderr.log 'echo myout; echo myerr 1>&2'Or to use files with the job id in them:
bsub -oo %J.out -eo %J.err 'echo myout; echo myerr 1>&2'By default as mentioned at:
bsub -oo:To get just the stdout to the file, use
bsub -N -oo which:- stores only stdout on the file
- re-enables the completion email
Another option is to run with the bsub This immediately prints stdout and stderr to the terminal.
-I option:bsub -I 'echo a;sleep 1;echo b;sleep 1;echo c'Bibliography:
Amazon's informtion about their own intances is so bad and non-public that this was created: instances.vantage.sh/
Large but ephemeral storage for EC2 instances. Predetermined by the EC2 instance type. Stays in the local server disk. Not automatically mounted.
- docs.aws.amazon.com/AWSEC2/latest/UserGuide/InstanceStorage.html (archive) notably highlights what it persists, which is basically nothing
- serverfault.com/questions/433703/how-to-use-instance-store-volumes-storage-in-amazon-ec2 mentions that you have to mount it
In this tutorial, we will use the Jena SPARQL hello world as a starting point. Tested on Apache Jena 4.10.0.
Basic query on rdf/vcard.ttl RDF Turtle data to find the person with full name "John Smith":Output:
sparql --data=rdf/vcard.ttl --query=<( printf '%s\n' 'SELECT ?x WHERE { ?x <http://www.w3.org/2001/vcard-rdf/3.0#FN> "John Smith" }')---------------------------------
| x |
=================================
| <http://somewhere/JohnSmith/> |
---------------------------------To avoid writing Output:
http://www.w3.org/2001/vcard-rdf/3.0# a billion times as queries grow larger, we can use the PREFIX syntax:sparql --data=rdf/vcard.ttl --query=<( printf '%s\n' '
PREFIX vc: <http://www.w3.org/2001/vcard-rdf/3.0#>
SELECT ?x
WHERE { ?x vc:FN "John Smith" }
')---------------------------------
| x |
=================================
| <http://somewhere/JohnSmith/> |
---------------------------------Bibliography:
- UniProt contains some amazing examples runnable on their servers: sparql.uniprot.org/.well-known/sparql-examples/
Tested on Ubuntu 23.10 with P14s:TODO fails with:
sudo apt install hipcc
git clone https://github.com/ROCm/HIP-Examples
cd HIP-Examples/HIP-Examples-Applications/HelloWorld
make/bin/hipcc -g -c -o HelloWorld.o HelloWorld.cpp
clang: error: cannot find ROCm device library for gfx1103; provide its path via '--rocm-path' or '--rocm-device-lib-path', or pass '-nogpulib' to build without ROCm device library
make: *** [<builtin>: HelloWorld.o] Error 1 There are unlisted articles, also show them or only show them.