Home by Alaya Barry 0 2025-08-08
Welcome to my home page!
Home by sales001 0 2025-08-07
Welcome to my home page!
When I lost my cryptocurrency, I never thought I'd be able to recover it, but thanks to Autopsy Mainnet Recovery (AMR) and their excellent recovery services, I was able to do so. I had fallen victim to a cryptocurrency fraud that had stolen all of my life savings. The sense of hopelessness that ensued was tremendous. I spent countless hours researching potential solutions online and reading stories from others who had suffered similar losses. In my search for answers, I came across Autopsy Mainnet Recovery while perusing several bitcoin forums.
What stood out about AMR was not just the success stories shared by previous clients but also their transparent approach. This gave me hope; perhaps there was a chance to reclaim what I had lost. Throughout the recovery process, the team at AMR kept open lines of communication, providing regular updates on progress and any obstacles encountered. After weeks of meticulous effort and collaboration with Autopsy Mainnet Recovery's professionals, I received the much-anticipated news: my lost crypto assets had been successfully recovered!
I want to thank Autopsy Mainnet Recovery for their help in getting back my lost money. I highly recommend their team to all victims seeking assistance to recover their lost funds from crypto. If you find yourself in a similar situation, do not hesitate to reach out to AMR
Whats App: +44 758 601 9698
Home by Miles Wyatt 0 2025-08-05
Welcome to my home page!
Home by cirosantilli7 0 2025-08-04
Welcome to my home page!
rpi-pico-w/upython/adc.py by Ciro Santilli 37 Created 2025-07-27 Updated 2025-08-08
The program continuously prints to the USB the value of the ADC on GPIO 26 once every 0.2 seconds.
The onboard LED is blinked as a heartbeat.
The hello world is with a potentiometer: extremes on GND and VCC pins of the Pi, and middle output on pin GIO26, then as you turn the knob, the uart value goes from about 0 to about 64k.
The 0 side is quite noisy and varies between 0 and 300 for some reason.
In Ciro's ASCII art circuit diagram notation:
RPI_PICO_W__gnd__gpio26Adc__3.3V@36
            |    |          |
            |    |          |
            |  +-+          |
            |  |            |
            |  |  +---------+ 
            |  |  |
         P__1__2__3
Build worked:
west build -d build/microbit/hello_world -b bbc_microbit samples/hello_world
but flash failed:
west flash -d build/microbit/hello_world
Related: mattoppenheim.com/2018/06/24/using-udev-to-remove-the-need-for-sudo-with-the-bbc-microbit
The build also generates a .hex file by default, and we've tried to flash it manually with:
cp build/microbit/hello_world/zephyr/zephyr.hex /media/ciro/MICROBIT/
but we failed to see it do anything with zephyr/blink_gpio.c, so not sure if the flashing was broken or if the code was broken, or if we didn't find the IO pins correctly.
Any print() command ends up on the USB, and is shown on the computer via programs such as ampy get back.
However, you can also send data over actual UART.
We connect Pin 0 (TX), Pin 1 (RX) and Pin 2 (GND) to the DSD TECH, and the USB to the Ubuntu 25.04 host laptop.
Then on the host laptop I run:
screen /dev/ttyUSB0 9600
and a counter shows up there just fine!
rpi-pico-w/upython/blink_gpio.py by Ciro Santilli 37 Created 2025-07-26 Updated 2025-07-27
Blink on-board LED. Note that they broke the LED hello world compatibility from non-W to W for God's sake!!!
The MicroPython code needs to be changed from the Raspberry Pi Pico 1, forums.raspberrypi.com/viewtopic.php?p=2016234#p2016234 comments:
Unlike the original Raspberry Pi Pico, the on-board LED on Pico W is not connected to a pin on RP2040, but instead to a GPIO pin on the wireless chip.

Pinned article: Introduction to the OurBigBook Project

Welcome to the OurBigBook Project! Our goal is to create the perfect publishing platform for STEM subjects, and get university-level students to write the best free STEM tutorials ever.
Everyone is welcome to create an account and play with the site: ourbigbook.com/go/register. We belive that students themselves can write amazing tutorials, but teachers are welcome too. You can write about anything you want, it doesn't have to be STEM or even educational. Silly test content is very welcome and you won't be penalized in any way. Just keep it legal!
We have two killer features:
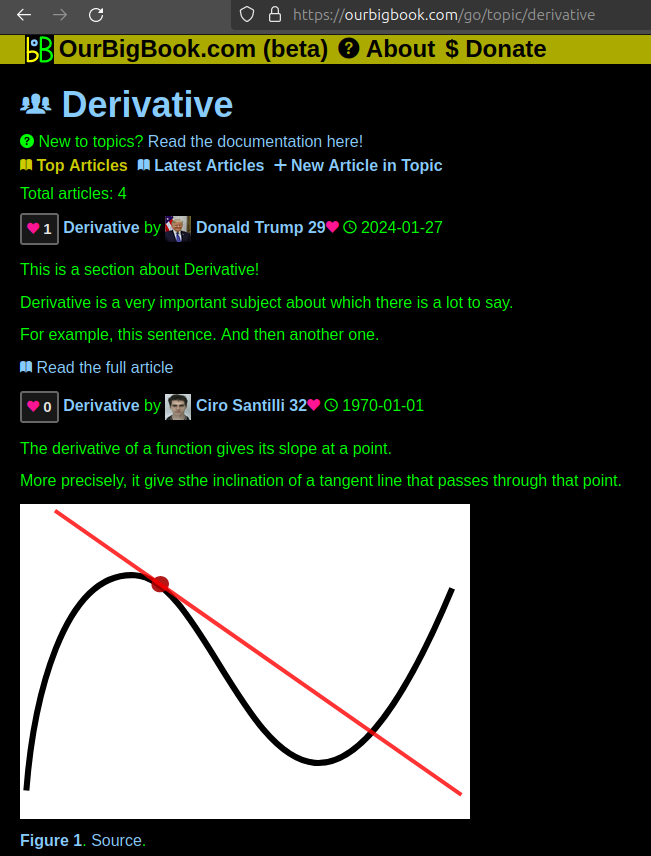
  1. topics: topics group articles by different users with the same title, e.g. here is the topic for the "Fundamental Theorem of Calculus" ourbigbook.com/go/topic/fundamental-theorem-of-calculus
    Articles of different users are sorted by upvote within each article page. This feature is a bit like:
    • a Wikipedia where each user can have their own version of each article
    • a Q&A website like Stack Overflow, where multiple people can give their views on a given topic, and the best ones are sorted by upvote. Except you don't need to wait for someone to ask first, and any topic goes, no matter how narrow or broad
    This feature makes it possible for readers to find better explanations of any topic created by other writers. And it allows writers to create an explanation in a place that readers might actually find it.
    Figure 1.
    Screenshot of the "Derivative" topic page
    . View it live at: ourbigbook.com/go/topic/derivative
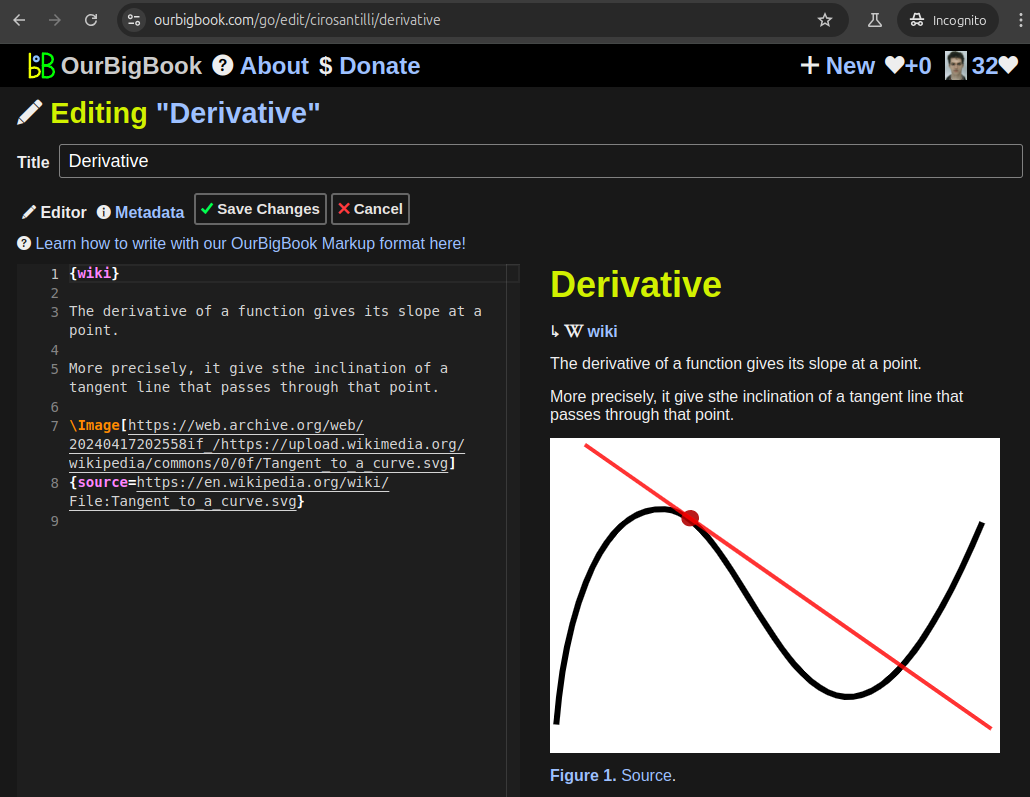
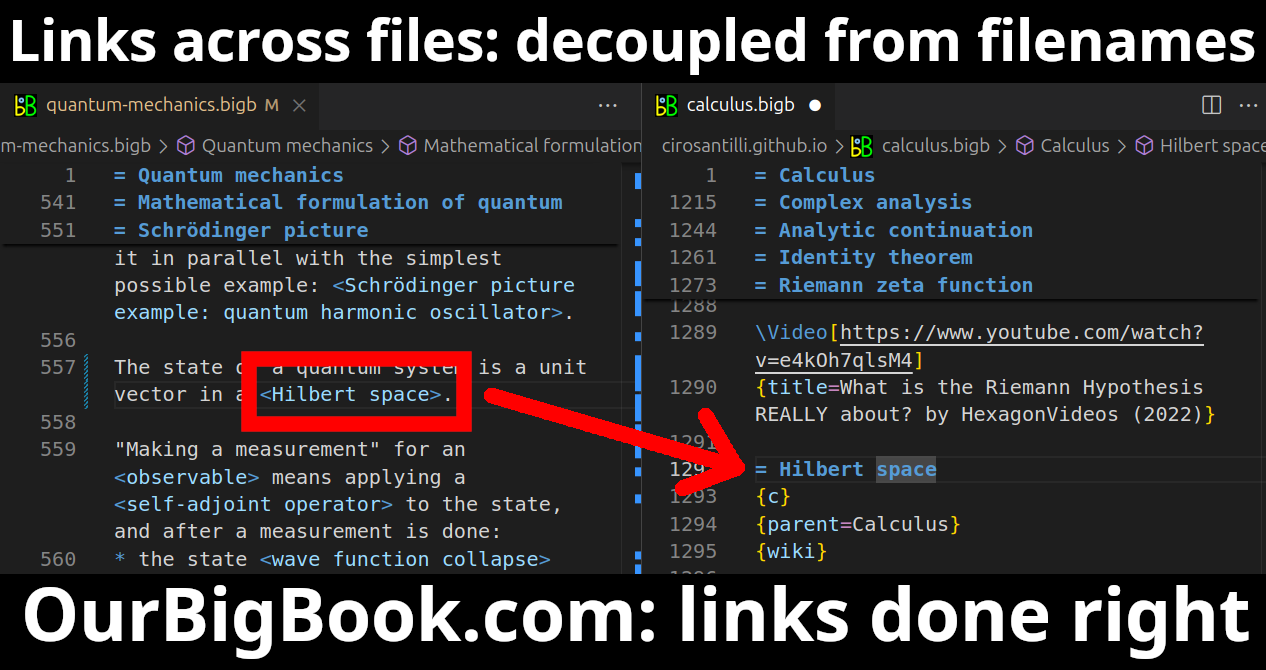
  2. local editing: you can store all your personal knowledge base content locally in a plaintext markup format that can be edited locally and published either:
    This way you can be sure that even if OurBigBook.com were to go down one day (which we have no plans to do as it is quite cheap to host!), your content will still be perfectly readable as a static site.
    Figure 2.
    You can publish local OurBigBook lightweight markup files to either https://OurBigBook.com or as a static website
    .
    Figure 3.
    Visual Studio Code extension installation
    .
    Figure 4.
    Visual Studio Code extension tree navigation
    .
    Figure 5.
    Web editor
    . You can also edit articles on the Web editor without installing anything locally.
    Video 3.
    Edit locally and publish demo
    . Source. This shows editing OurBigBook Markup and publishing it using the Visual Studio Code extension.
    Video 4.
    OurBigBook Visual Studio Code extension editing and navigation demo
    . Source.
  3. https://raw.githubusercontent.com/ourbigbook/ourbigbook-media/master/feature/x/hilbert-space-arrow.png
  4. Infinitely deep tables of contents:
    Figure 6.
    Dynamic article tree with infinitely deep table of contents
    .
    Descendant pages can also show up as toplevel e.g.: ourbigbook.com/cirosantilli/chordate-subclade
All our software is open source and hosted at: github.com/ourbigbook/ourbigbook
Further documentation can be found at: docs.ourbigbook.com
Feel free to reach our to us for any help or suggestions: docs.ourbigbook.com/#contact