
Numerical solution:
55129975871328418Earliest known public leak: github.com/lucky-bai/projecteuler-solutions/issues/98
Numerical solution:
7259046Earliest known public leak: github.com/lucky-bai/projecteuler-solutions/pull/95
Numerical solution:
166666666689036288Earliest known public leak: github.com/lucky-bai/projecteuler-solutions/pull/94
Numerical solution:
243559751Earliest known public leak: github.com/lucky-bai/projecteuler-solutions/issues/93
Numerical solution:
367554579311Earliest known public leak: github.com/lucky-bai/projecteuler-solutions/issues/93
Numerical solution:
367554579311Earliest known public leak: github.com/lucky-bai/projecteuler-solutions/commit/f7d538c7fa68d4a502da6705fd7ec3afc89e0cf9#diff-37cf8442cb9ce8d4c7401df424ea9362634a8a8733caa930c07346ea624be24fR961
Solution:
Numerical solution:
882086212Earliest known public leak: github.com/lucky-bai/projecteuler-solutions/commit/a6ff5a562e32d17b044638b72f831d7bcba96ef2
Numerical solution:
6795261671274Earliest known public leak: github.com/lucky-bai/projecteuler-solutions/pull/89
Numerical solution:
736463823Earliest known public leak: github.com/lucky-bai/projecteuler-solutions/pull/88
Numerical solution:
176907658Earliest known public leak: github.com/lucky-bai/projecteuler-solutions/pull/88
Numerical solution:
726010935Earliest known public leak: github.com/lucky-bai/projecteuler-solutions/issues/105
This problem took several months to get publicly leaked, one of the longest by far on github.com/lucky-bai/projecteuler-solutions
Numerical solution:Earliest known public leak: github.com/lucky-bai/projecteuler-solutions/issues/87
1033654680825334184 Pinned article: Introduction to the OurBigBook Project
Welcome to the OurBigBook Project! Our goal is to create the perfect publishing platform for STEM subjects, and get university-level students to write the best free STEM tutorials ever.
Everyone is welcome to create an account and play with the site: ourbigbook.com/go/register. We belive that students themselves can write amazing tutorials, but teachers are welcome too. You can write about anything you want, it doesn't have to be STEM or even educational. Silly test content is very welcome and you won't be penalized in any way. Just keep it legal!
Intro to OurBigBook
. Source. We have two killer features:
- topics: topics group articles by different users with the same title, e.g. here is the topic for the "Fundamental Theorem of Calculus" ourbigbook.com/go/topic/fundamental-theorem-of-calculusArticles of different users are sorted by upvote within each article page. This feature is a bit like:
- a Wikipedia where each user can have their own version of each article
- a Q&A website like Stack Overflow, where multiple people can give their views on a given topic, and the best ones are sorted by upvote. Except you don't need to wait for someone to ask first, and any topic goes, no matter how narrow or broad
This feature makes it possible for readers to find better explanations of any topic created by other writers. And it allows writers to create an explanation in a place that readers might actually find it.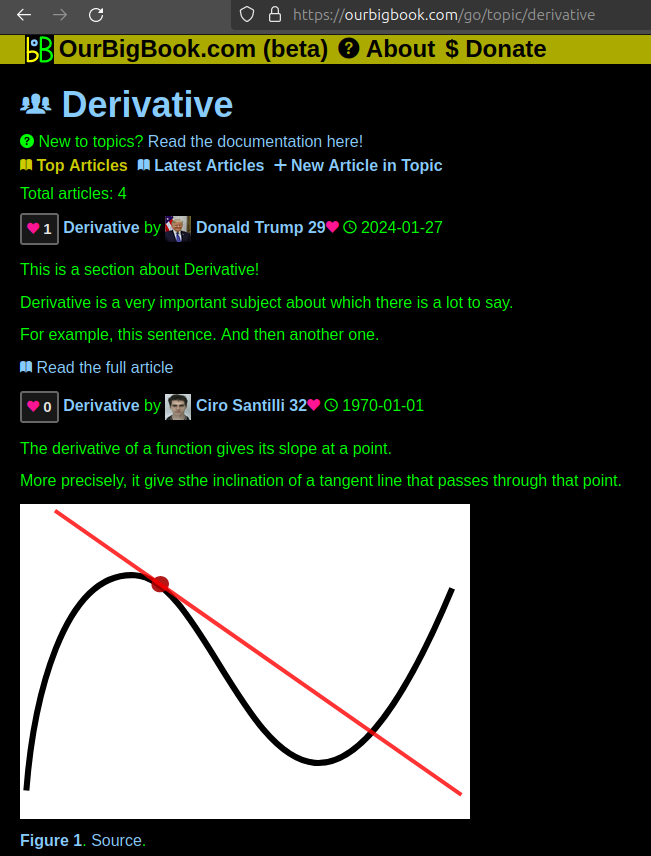
Figure 1. Screenshot of the "Derivative" topic page. View it live at: ourbigbook.com/go/topic/derivativeVideo 2. OurBigBook Web topics demo. Source. - local editing: you can store all your personal knowledge base content locally in a plaintext markup format that can be edited locally and published either:This way you can be sure that even if OurBigBook.com were to go down one day (which we have no plans to do as it is quite cheap to host!), your content will still be perfectly readable as a static site.
- to OurBigBook.com to get awesome multi-user features like topics and likes
- as HTML files to a static website, which you can host yourself for free on many external providers like GitHub Pages, and remain in full control
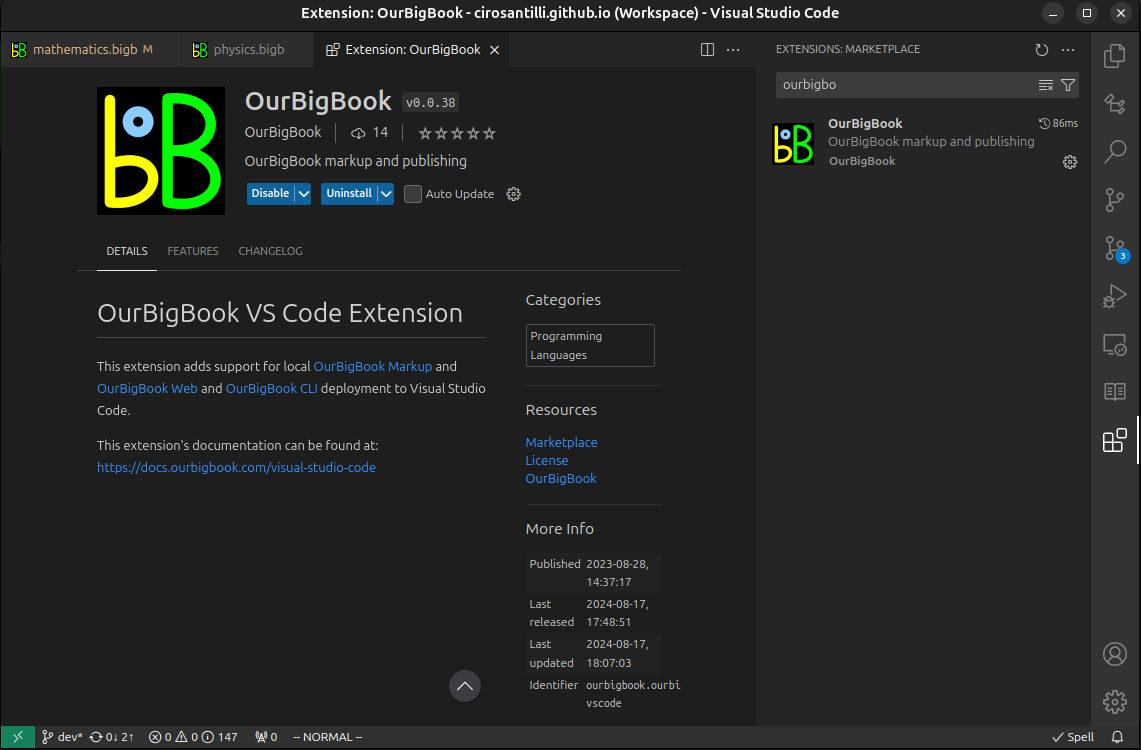
Figure 3. Visual Studio Code extension installation.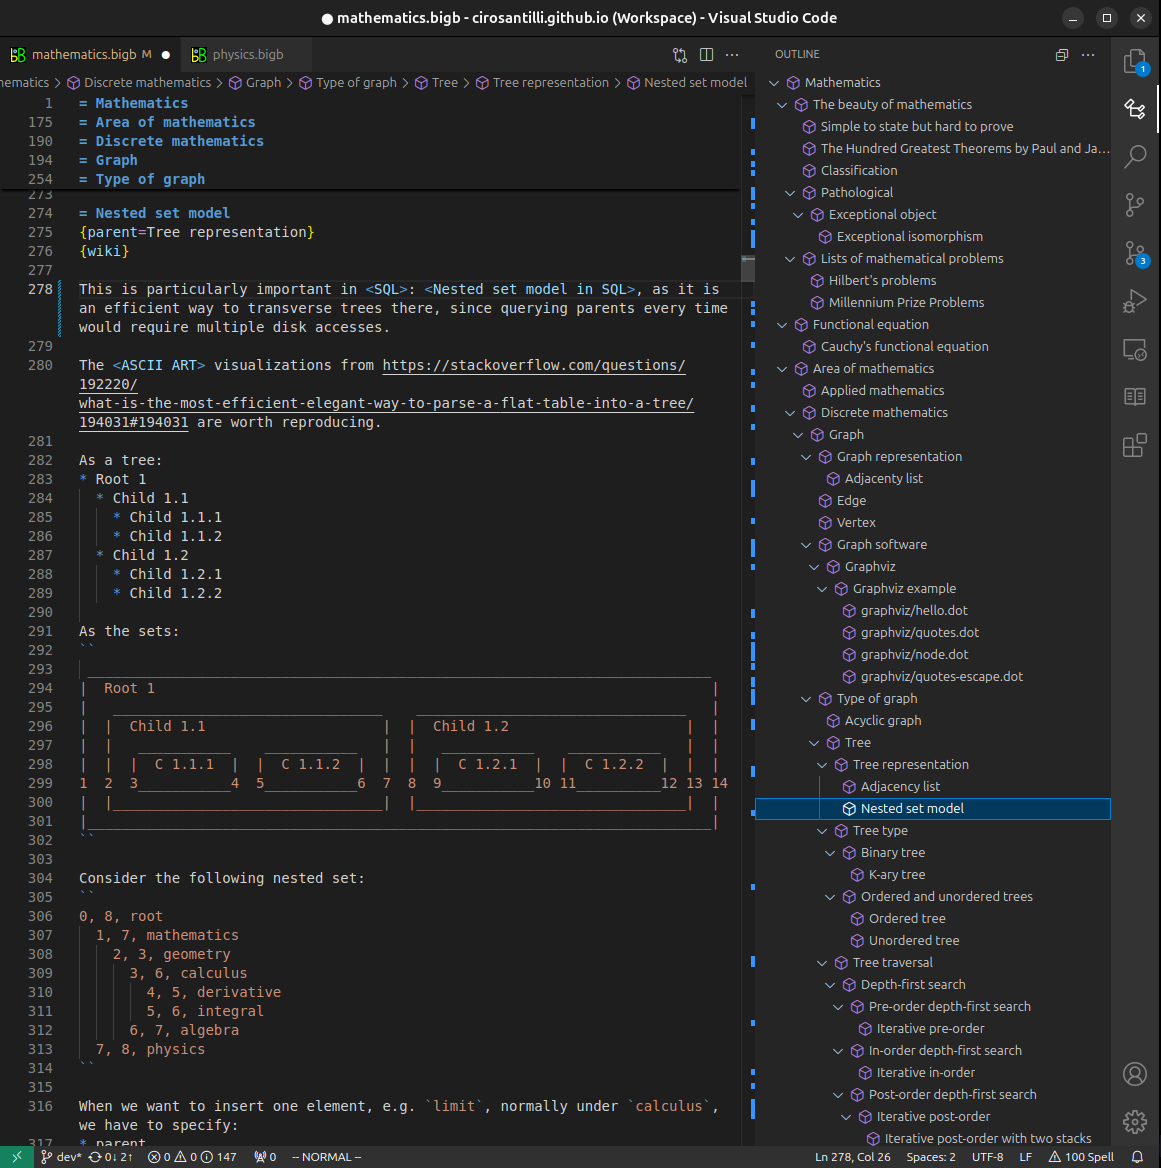
Figure 4. Visual Studio Code extension tree navigation.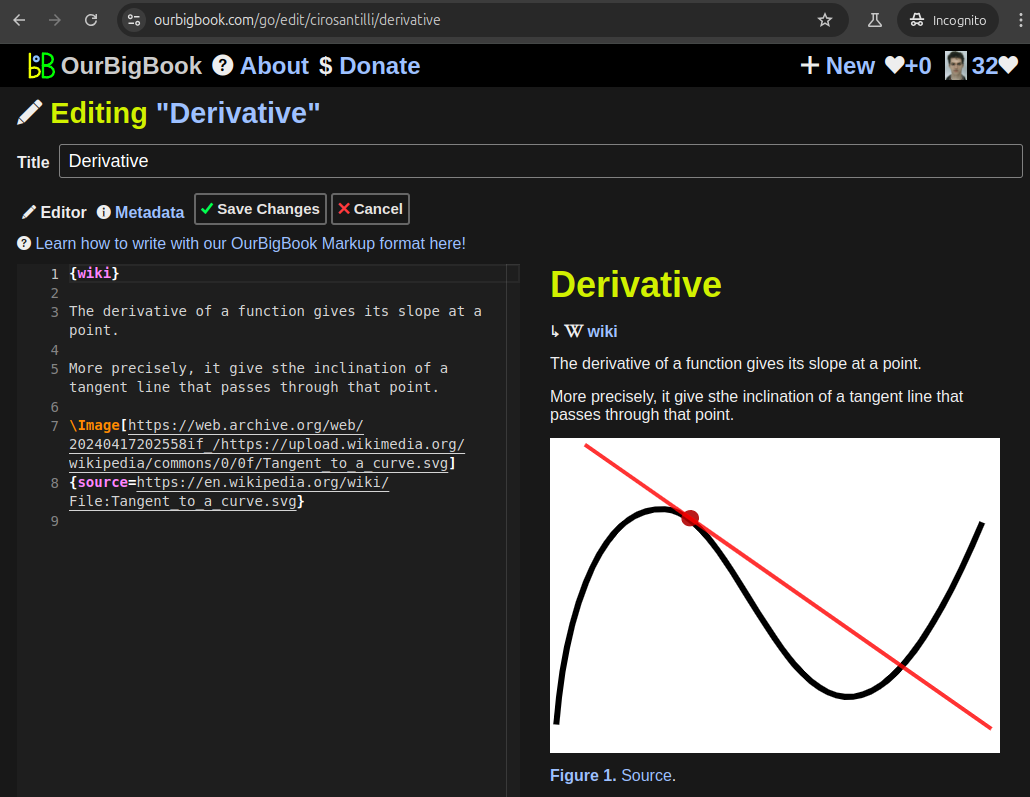
Figure 5. Web editor. You can also edit articles on the Web editor without installing anything locally.Video 3. Edit locally and publish demo. Source. This shows editing OurBigBook Markup and publishing it using the Visual Studio Code extension.Video 4. OurBigBook Visual Studio Code extension editing and navigation demo. Source. 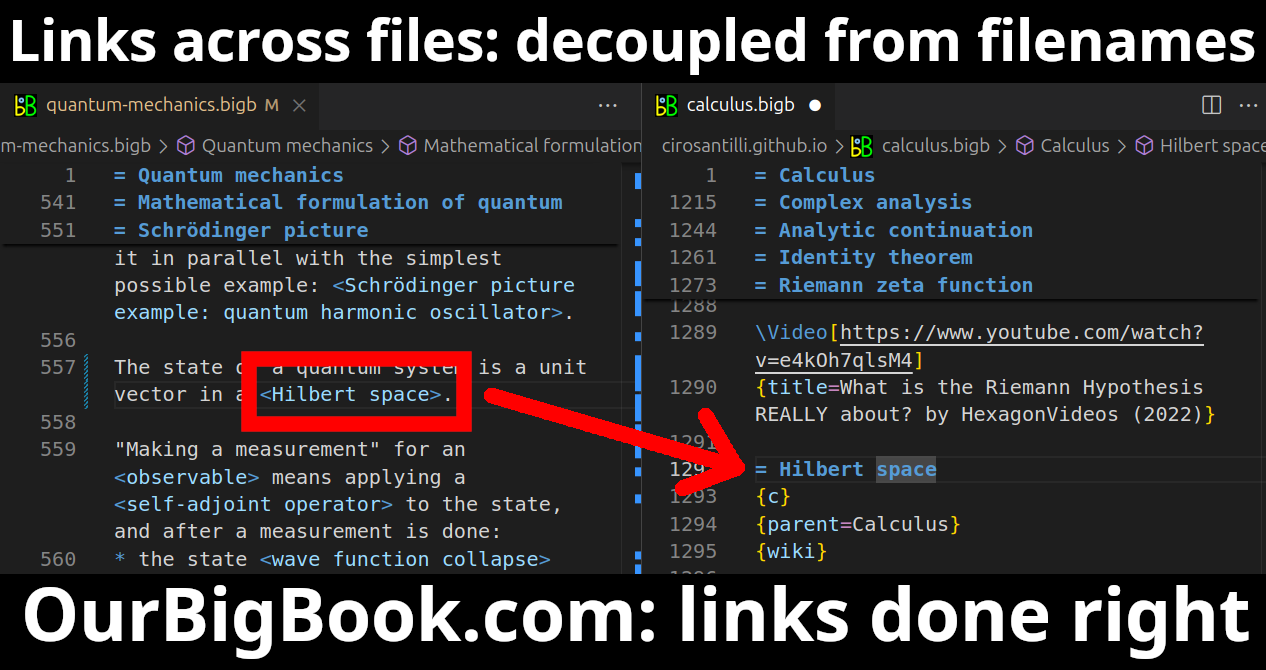
- Infinitely deep tables of contents:

All our software is open source and hosted at: github.com/ourbigbook/ourbigbook
Further documentation can be found at: docs.ourbigbook.com
Feel free to reach our to us for any help or suggestions: docs.ourbigbook.com/#contact