Georges Bruhat is a notable figure in the field of mathematics, particularly in the area of functional analysis and the theory of distributions. He is best known for his contributions to the duality theory between spaces of functions and distributions, as well as for his work on functional spaces. Bruhat, along with other mathematicians, developed the theory that led to the Bruhat-Schaeffer theorem, which pertains to the structure of certain spaces within functional analysis.
"Blue's Clues" is a popular educational children's television series created for Nickelodeon, which has also inspired a series of video games. The premise of "Blue's Clues" revolves around a blue-spotted dog named Blue who leaves paw print clues for her human friend, Steve (and later Joe and Josh), to solve various puzzles and mysteries. The show's interactive format invites children to participate by answering questions and searching for clues.
Bob Frankston is an American computer engineer and entrepreneur, best known for his work in the field of computing and telecommunications. He is particularly recognized as a co-creator of VisiCalc, the first spreadsheet software, which played a significant role in the rise of personal computing in the late 1970s and early 1980s. Frankston was also involved in various other technology initiatives and has contributed to discussions about the impact of technology on society and the nature of the internet.
Geomatics organizations focus on the science, engineering, and technology involved in the collection, analysis, and management of spatial and geographic data. Geomatics is an interdisciplinary field that encompasses various aspects of geography, surveying, cartography, remote sensing, and geographic information systems (GIS). These organizations can vary widely in their functions and objectives, including: 1. **Professional Associations**: Many geomatics organizations are professional bodies that bring together professionals working in fields like surveying, mapping, and GIS.
Project NIMROD generally refers to a British project that aimed to develop an aircraft with advanced capabilities during the Cold War era. More specifically, it was an initiative by the UK Ministry of Defence and was designed for various military purposes, including surveillance, reconnaissance, and potential strike capabilities. However, depending on the context, "NIMROD" could refer to different initiatives or projects in various fields, including technology or military operations.
The inverse scattering problem is a mathematical and physical challenge that involves determining the properties of an object or medium based on the scattered waves that arise when an incident wave interacts with it. This problem is particularly relevant in fields such as physics, engineering, and medical imaging, where the goal is to reconstruct information about an object's shape, composition, or internal structure from the measurements of waves (such as electromagnetic, acoustic, or seismic waves) that are scattered off of it.
Axiomatic quantum field theory is a mathematical framework designed to provide a rigorous foundation for quantum field theory (QFT) using a set of axioms. This approach seeks to establish the principles of QFT in a way analogous to the axiomatic foundations in mathematics or physics, such as in the formulation of general relativity or quantum mechanics.
The term "Bott cannibalistic class" doesn't seem to correspond to any widely recognized concept or terminology in mathematics, biology, or other fields as of my last knowledge update in October 2023. It’s possible that it refers to a very specific concept within a niche area of study, or it could be a misunderstanding or miscommunication of another term.
In engineering and systems design, a "bottleneck" refers to a point in a process where the capacity is limited, thereby restricting the overall performance or flow of the system. This can occur in various contexts, including manufacturing, computer networks, project management, and supply chain operations.
The term "Bragg plane" is often associated with the field of crystallography and X-ray diffraction. It refers to a specific plane in a crystal lattice where constructive interference of X-rays occurs due to diffraction. When X-rays are scattered by the electron clouds of atoms in a crystal, the scattered waves can interfere with each other.
Proof-number search (PNS) is a method used in artificial intelligence, particularly in the domain of game playing and automated theorem proving. It is a search strategy that focuses on determining the strength or quality of a position in a game or a proof in a logic problem. PNS operates by evaluating the proof numbers and disproof numbers associated with different nodes in a search tree.
Zinc finger protein 426 (ZNF426) is a type of protein that belongs to the family of zinc finger proteins, which are characterized by the presence of zinc finger motifs. These motifs are structural domains that stabilize the protein structure through coordination with zinc ions, typically consisting of cysteine and histidine residues. Zinc finger proteins are often involved in DNA binding, protein-protein interactions, and regulatory functions in various cellular processes.
A Bravais lattice is a concept in crystallography that describes a specific arrangement of points in space, which represents the periodic repetition of a motif in three-dimensional space. It is defined by a set of discrete points that are arranged in a pattern that repeats at regular intervals, effectively forming the basis for the structure of a crystalline solid.
Bridge Base Online (BBO) is a popular online platform for playing bridge, a card game that is played with four players in two competing partnerships. Launched in 1995, BBO allows players to play bridge against others from around the world, participate in tournaments, and practice their skills. Key features of Bridge Base Online include: 1. **Play Modes**: Users can play casual games, participate in organized tournaments, and engage in online bridge lessons.
The Bridge Software Institute is an organization focused on advancing the field of software engineering and systems development. It typically emphasizes the importance of collaboration between various disciplines, such as engineering, business, and social sciences, to create effective and efficient software solutions. The institute may provide education, training, and resources for professionals in software development, aiming to bridge gaps between theory and practice in software engineering methodologies. Its initiatives can include workshops, certifications, and research projects aimed at improving software practices and fostering innovation within the industry.
The British Post Office scandal, also known as the Post Office Horizon IT scandal, refers to a significant miscarriage of justice in the United Kingdom involving the wrongful prosecution of sub-postmasters and sub-postmistresses based on faulty accounting data provided by the Horizon IT system. This scandal emerged in the late 1990s and continued for over two decades. **Key points of the scandal:** 1.
The Brunswick Heritage Museum, located in Brunswick, Maryland, is a local history museum that focuses on preserving and showcasing the history of the Brunswick area and the surrounding region. The museum features exhibits on various topics, including the town’s historical significance, transportation, and its development over the years. The museum often highlights the impact of the Baltimore and Ohio Railroad, as Brunswick was an important railroad town.
Proportional cake-cutting with different entitlements refers to a method for dividing a cake (or any divisible good) among several participants in such a way that each participant receives a fair or proportional share based on their entitlement or claim to the overall resource. In cake-cutting scenarios, "entitlement" usually means the amount that each participant believes they should receive based on some criteria, which could be agreed-upon proportions or personal preferences.
Bruno Zumino was an influential theoretical physicist known for his work in quantum field theory, particularly in the context of supersymmetry and particle physics. He made significant contributions to various areas, including string theory and conformal field theories. His work on the AdS/CFT correspondence has been particularly notable in the context of theoretical physics. Aside from his research contributions, Zumino was also respected for his role as an educator and mentor, having influenced many students and researchers in the field.
Pinned article: Introduction to the OurBigBook Project
Welcome to the OurBigBook Project! Our goal is to create the perfect publishing platform for STEM subjects, and get university-level students to write the best free STEM tutorials ever.
Everyone is welcome to create an account and play with the site: ourbigbook.com/go/register. We belive that students themselves can write amazing tutorials, but teachers are welcome too. You can write about anything you want, it doesn't have to be STEM or even educational. Silly test content is very welcome and you won't be penalized in any way. Just keep it legal!
Intro to OurBigBook
. Source. We have two killer features:
- topics: topics group articles by different users with the same title, e.g. here is the topic for the "Fundamental Theorem of Calculus" ourbigbook.com/go/topic/fundamental-theorem-of-calculusArticles of different users are sorted by upvote within each article page. This feature is a bit like:
- a Wikipedia where each user can have their own version of each article
- a Q&A website like Stack Overflow, where multiple people can give their views on a given topic, and the best ones are sorted by upvote. Except you don't need to wait for someone to ask first, and any topic goes, no matter how narrow or broad
This feature makes it possible for readers to find better explanations of any topic created by other writers. And it allows writers to create an explanation in a place that readers might actually find it.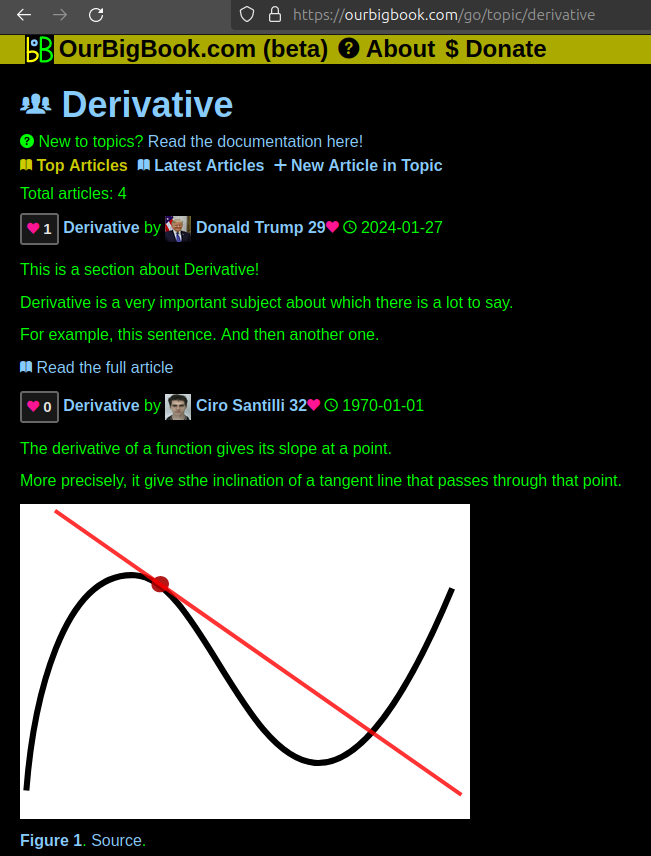
Figure 1. Screenshot of the "Derivative" topic page. View it live at: ourbigbook.com/go/topic/derivativeVideo 2. OurBigBook Web topics demo. Source. - local editing: you can store all your personal knowledge base content locally in a plaintext markup format that can be edited locally and published either:This way you can be sure that even if OurBigBook.com were to go down one day (which we have no plans to do as it is quite cheap to host!), your content will still be perfectly readable as a static site.
- to OurBigBook.com to get awesome multi-user features like topics and likes
- as HTML files to a static website, which you can host yourself for free on many external providers like GitHub Pages, and remain in full control
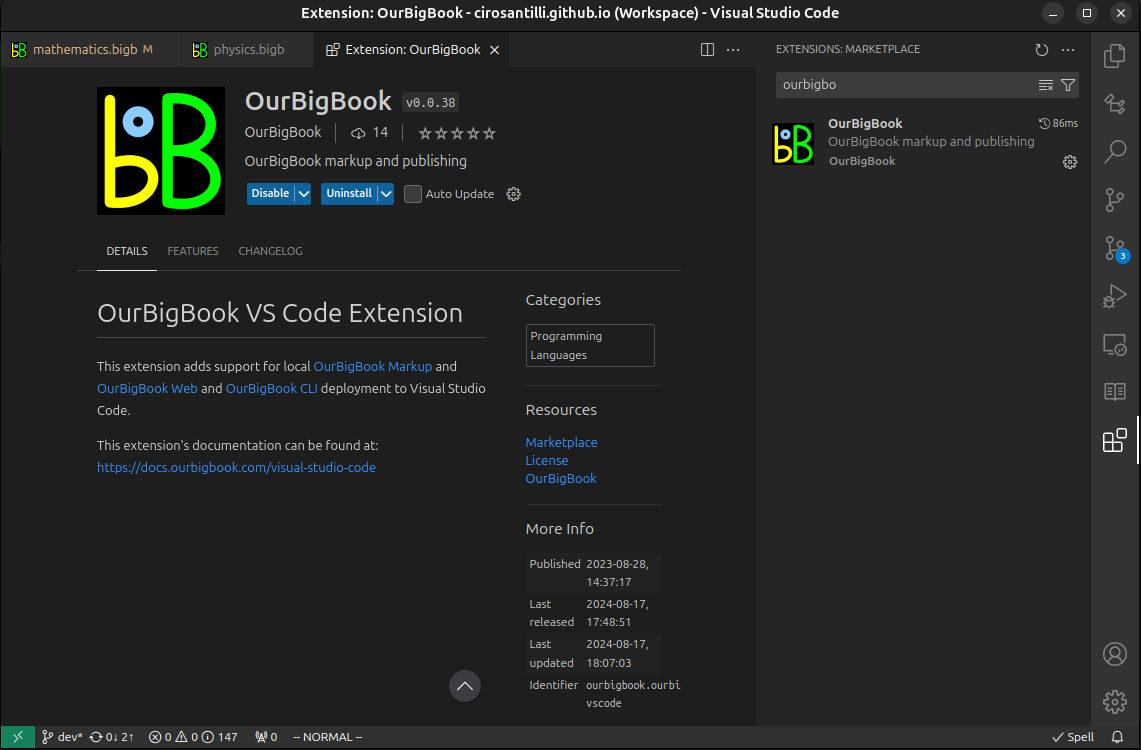
Figure 3. Visual Studio Code extension installation.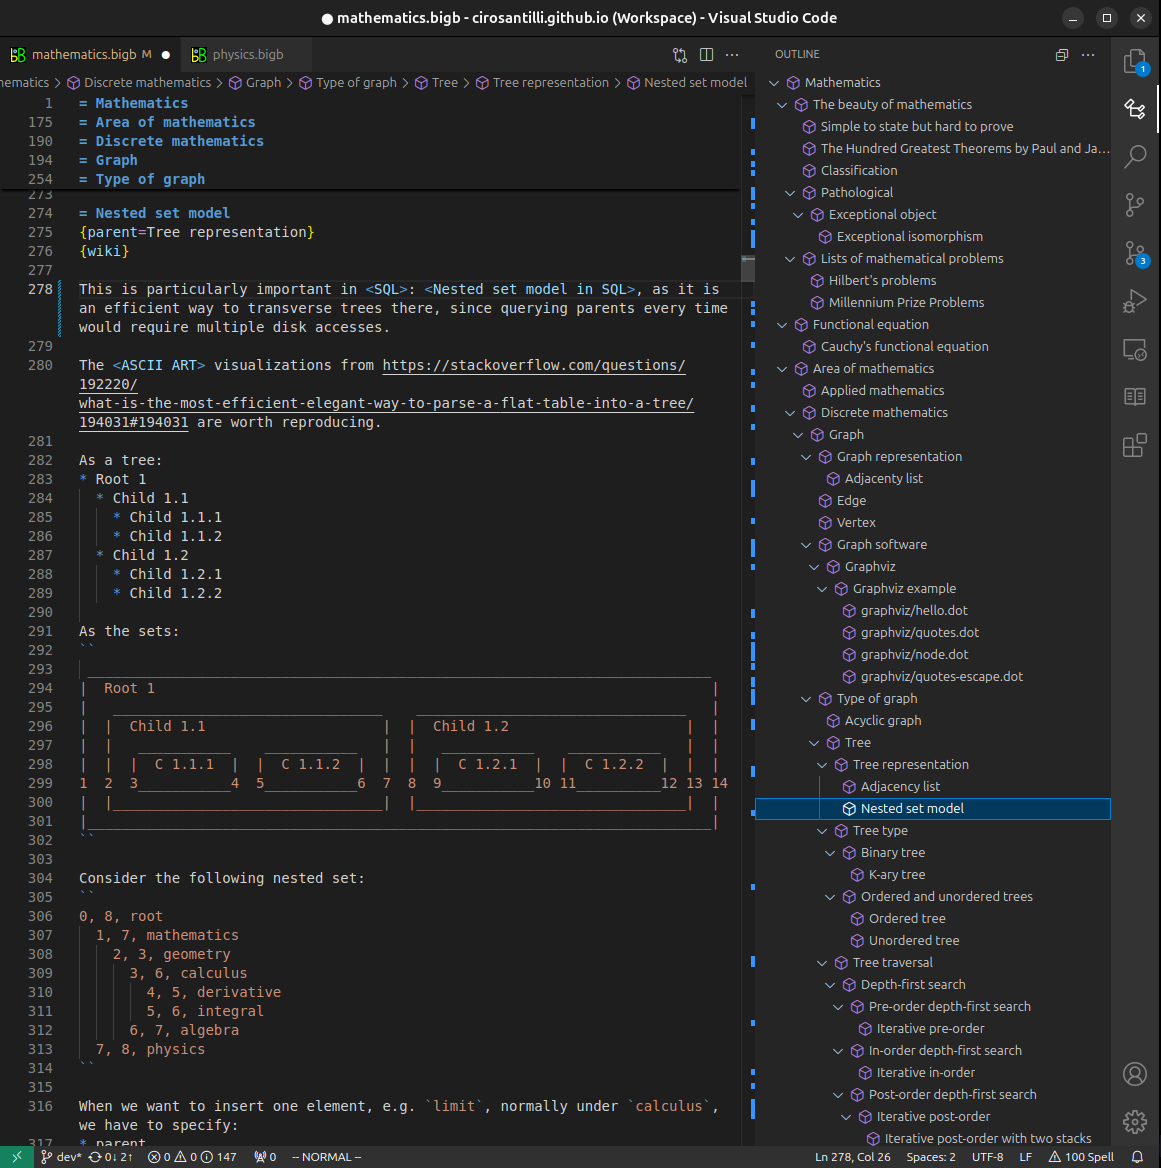
Figure 4. Visual Studio Code extension tree navigation.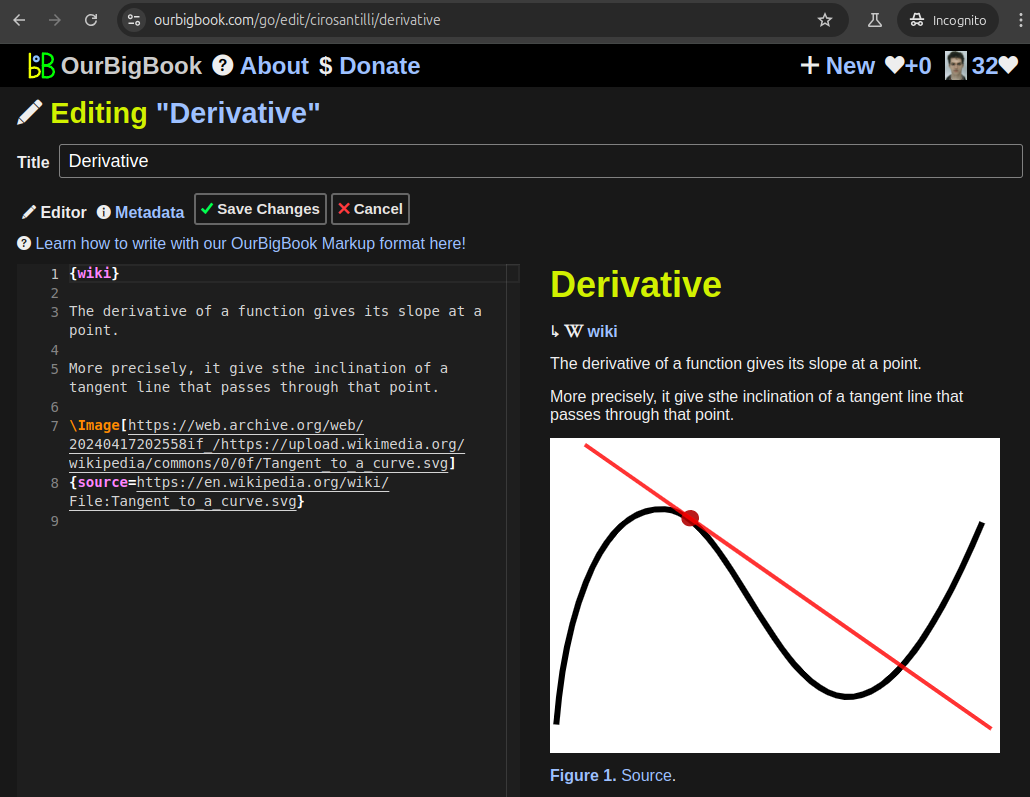
Figure 5. Web editor. You can also edit articles on the Web editor without installing anything locally.Video 3. Edit locally and publish demo. Source. This shows editing OurBigBook Markup and publishing it using the Visual Studio Code extension.Video 4. OurBigBook Visual Studio Code extension editing and navigation demo. Source. 
- Infinitely deep tables of contents:

All our software is open source and hosted at: github.com/ourbigbook/ourbigbook
Further documentation can be found at: docs.ourbigbook.com
Feel free to reach our to us for any help or suggestions: docs.ourbigbook.com/#contact