The best articles by Ciro Santilli Updated 2025-07-16
These are the best articles ever authored by Ciro Santilli, most of them in the format of Stack Overflow answers.
Ciro posts update about new articles on his Twitter accounts.
Some random generally less technical in-tree essays will be present at: Section "Essays by Ciro Santilli".
- Trended on Hacker News:
- CIA 2010 covert communication websites on 2023-06-11. 190 points, a mild success.
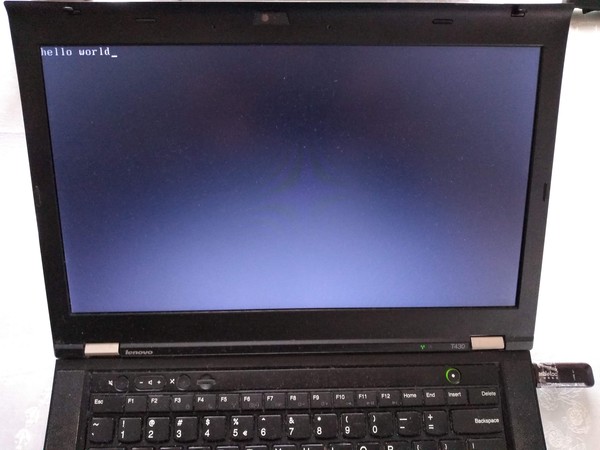
- x86 Bare Metal Examples on 2019-03-19. 513 points. The third time something related to that repo trends. Hacker news people really like that repo!
- again 2020-06-27 (archive). 200 points, repository traffic jumped from 25 daily unique visitors to 4.6k unique visitors on the day
- How to run a program without an operating system? on 2018-11-26 (archive). 394 points. Covers x86 and ARM
- ELF Hello World Tutorial on 2017-05-17 (archive). 334 points.
- x86 Paging Tutorial on 2017-03-02. Number 1 Google search result for "x86 Paging" in 2017-08. 142 points.
- x86 assembly
- What does "multicore" assembly language look like?
- What is the function of the push / pop instructions used on registers in x86 assembly? Going down to memory spills, register allocation and graph coloring.
- Linux kernel
- What do the flags in /proc/cpuinfo mean?
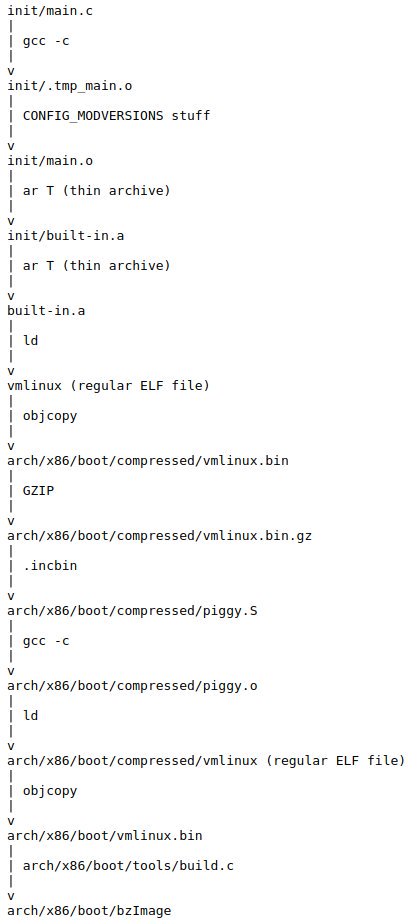
- How does kernel get an executable binary file running under linux?
- How to debug the Linux kernel with GDB and QEMU?
- Can the sys_execve() system call in the Linux kernel receive both absolute or relative paths?
- What is the difference between the kernel space and the user space?
- Is there any API for determining the physical address from virtual address in Linux?
- Why do people write the
#!/usr/bin/envpython shebang on the first line of a Python script? - How to solve "Kernel Panic - not syncing: VFS: Unable to mount root fs on unknown-block(0,0)"?
- Single program Linux distro
- QEMU
- gcc and Binutils:
- How do linkers and address relocation works?
- What is incremental linking or partial linking?
- GOLD (
-fuse-ld=gold) linker vs the traditional GNU ld and LLVM ldd - What is the -fPIE option for position-independent executables in GCC and ld? Concrete examples by running program through GDB twice, and an assembly hello world with absolute vs PC relative load.
- How many GCC optimization levels are there?
- Why does GCC create a shared object instead of an executable binary according to file?
- C/C++: almost all of those fall into "disassemble all the things" category. Ciro also does "standards dissection" and "a new version of the standard is out" answers, but those are boring:
- What does "static" mean in a C program?
- In C++ source, what is the effect of
extern "C"? - Char array vs Char Pointer in C
- How to compile glibc from source and use it?
- When should
static_cast,dynamic_cast,const_castandreinterpret_castbe used? - What exactly is
std::atomicin C++?. This answer was originally more appropriately entitled "Let's disassemble some stuff", and got three downvotes, so Ciro changed it to a more professional title, and it started getting upvotes. People judge books by their covers. notmain.o 0000000000000000 0000000000000017 W MyTemplate<int>::f(int) main.o 0000000000000000 0000000000000017 W MyTemplate<int>::f(int)Code 1.. From: What is explicit template instantiation in C++ and when to use it?nmoutputs showing that objects are redefined multiple times across files if you don't use template instantiation properly
- IEEE 754
- What is difference between quiet NaN and signaling NaN?
- In Java, what does NaN mean?
Without subnormals:

          +---+---+-------+---------------+-------------------------------+
exponent  | ? | 0 |   1   |       2       |               3               |
          +---+---+-------+---------------+-------------------------------+
          |   |   |       |               |                               |
          v   v   v       v               v                               v
          -----------------------------------------------------------------
floats    *    **** * * * *   *   *   *   *       *       *       *       *
          -----------------------------------------------------------------
          ^   ^   ^       ^               ^                               ^
          |   |   |       |               |                               |
          0   |   2^-126  2^-125          2^-124                          2^-123
              |
              2^-127

With subnormals:

          +-------+-------+---------------+-------------------------------+
exponent  |   0   |   1   |       2       |               3               |
          +-------+-------+---------------+-------------------------------+
          |       |       |               |                               |
          v       v       v               v                               v
          -----------------------------------------------------------------
floats    * * * * * * * * *   *   *   *   *       *       *       *       *
          -----------------------------------------------------------------
          ^   ^   ^       ^               ^                               ^
          |   |   |       |               |                               |
          0   |   2^-126  2^-125          2^-124                          2^-123
              |
              2^-127
Code 2.Visualization of subnormal floating point numbers vs what IEEE 754 would look like without them. From: What is a subnormal floating point number?
- Computer science
- Algorithms
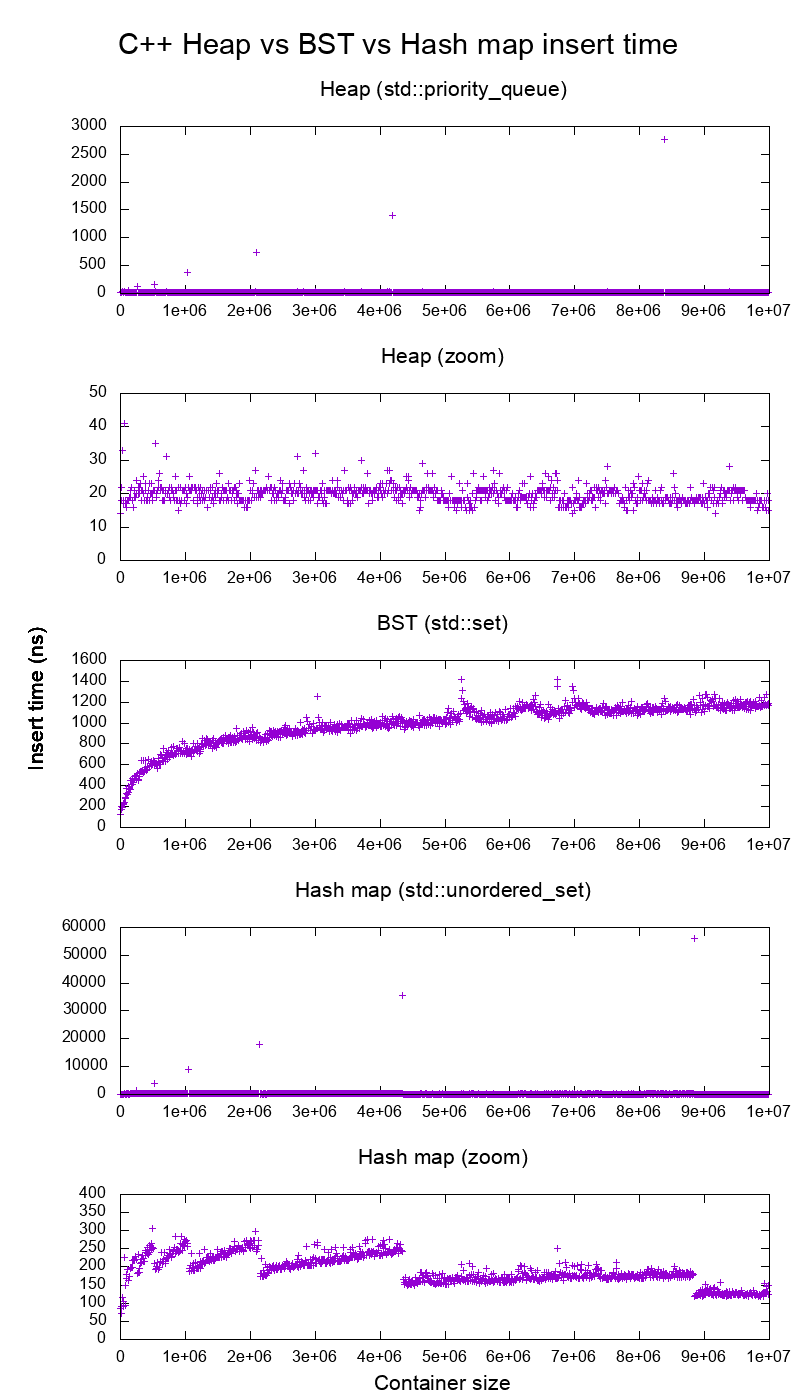
Figure 5. Average insertion time into heaps, binary search tree and hash maps of the C++ standard library. Source. From: Heap vs Binary Search Tree (BST)
- Is it necessary for NP problems to be decision problems?
- Polynomial time and exponential time. Answered focusing on the definition of "exponential time".
- What is the smallest Turing machine where it is unknown if it halts or not?. Answer focusing on "blank tape" initial condition only. Large parts of it are summarizing the Busy Beaver Challenge, but some additions were made.
- Algorithms
- Git
  | 0           | 4            | 8           | C              |
  |-------------|--------------|-------------|----------------|
0 | DIRC        | Version      | File count  | ctime       ...| 0
  | ...         | mtime                      | device         |
2 | inode       | mode         | UID         | GID            | 2
  | File size   | Entry SHA-1                              ...|
4 | ...                        | Flags       | Index SHA-1 ...| 4
  | ...                                                       |
Code 3.ASCII art depicting the binary file format of the Git index file. From: What does the git index contain EXACTLY?tree {tree_sha} {parents} author {author_name} <{author_email}> {author_date_seconds} {author_date_timezone} committer {committer_name} <{committer_email}> {committer_date_seconds} {committer_date_timezone} {commit message}Code 4.Description of the Git commit object binary data structure. From: What is the file format of a git commit object data structure?- How do I clone a subdirectory only of a Git repository?
- Python
- Web technology
- OpenGL
Figure 7. OpenGL rendering output dumped to a GIF file. Source. From: How to use GLUT/OpenGL to render to a file?- What are shaders in OpenGL?
- Why do we use 4x4 matrices to transform things in 3D?
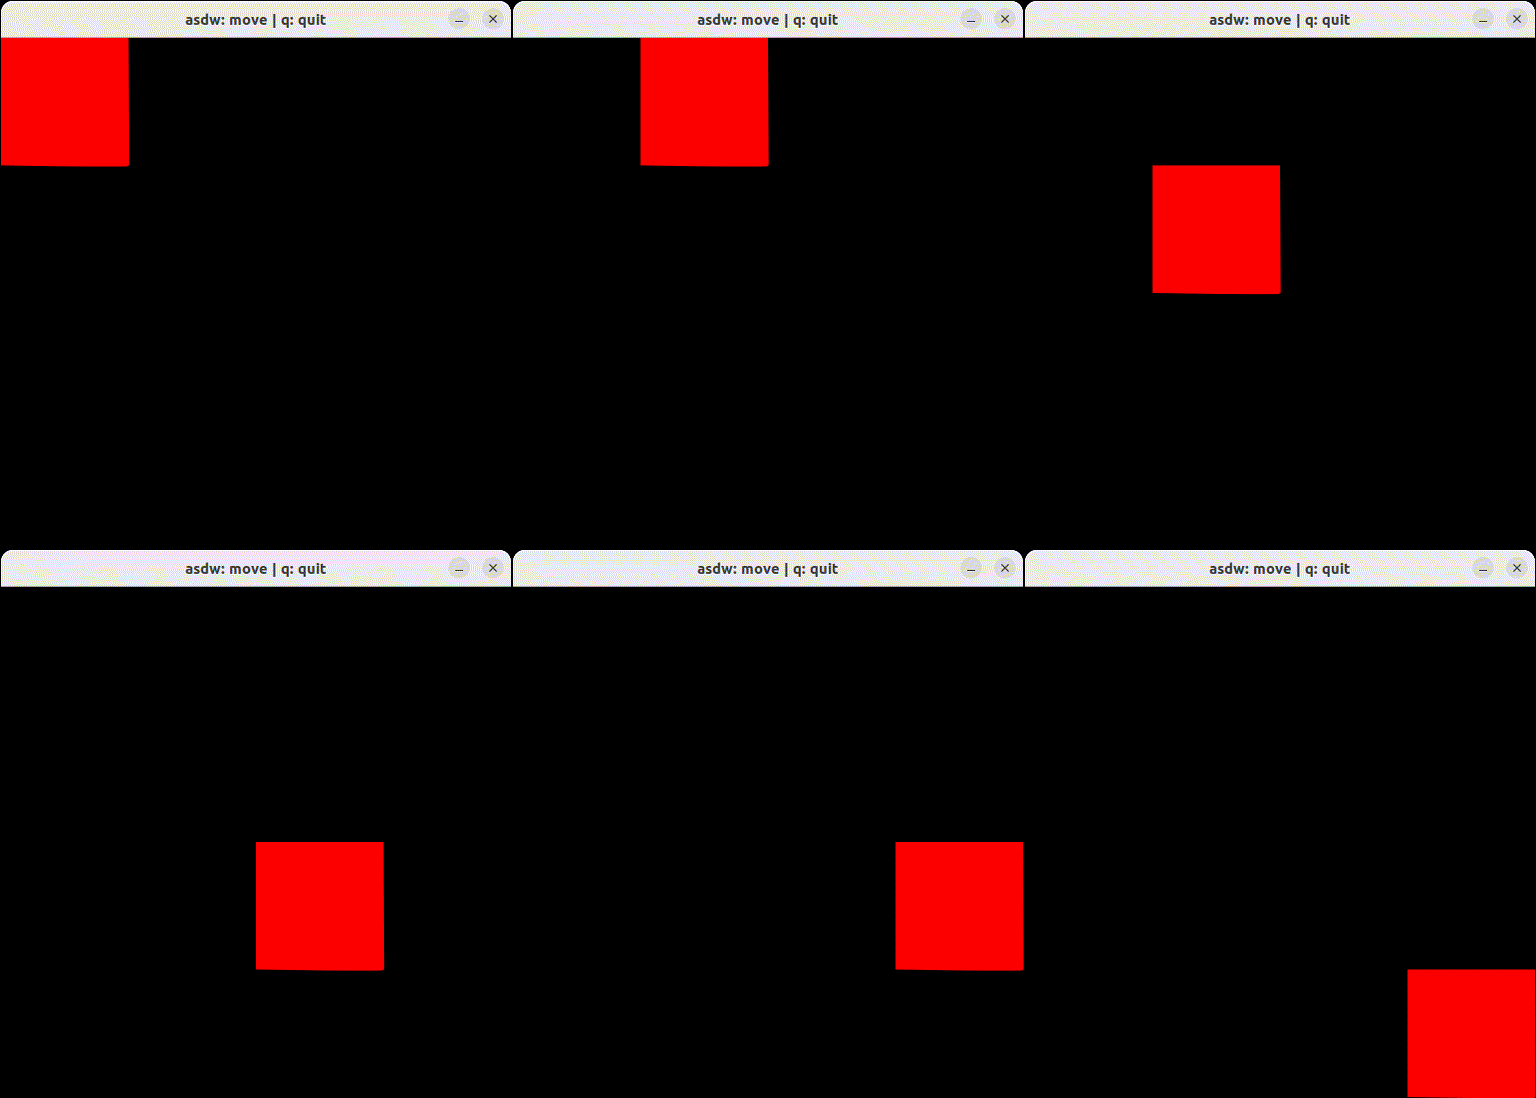
Figure 10. Sinusoidal circular wave heatmap generated with an OpenGL shader at 60 FPS on SDL. Source.
- Node.js
- Ruby on Rails
- POSIX
- What is POSIX? Huge classified overview of the most important things that POSIX specifies.
- Systems programming
- What do the terms "CPU bound" and "I/O bound" mean?
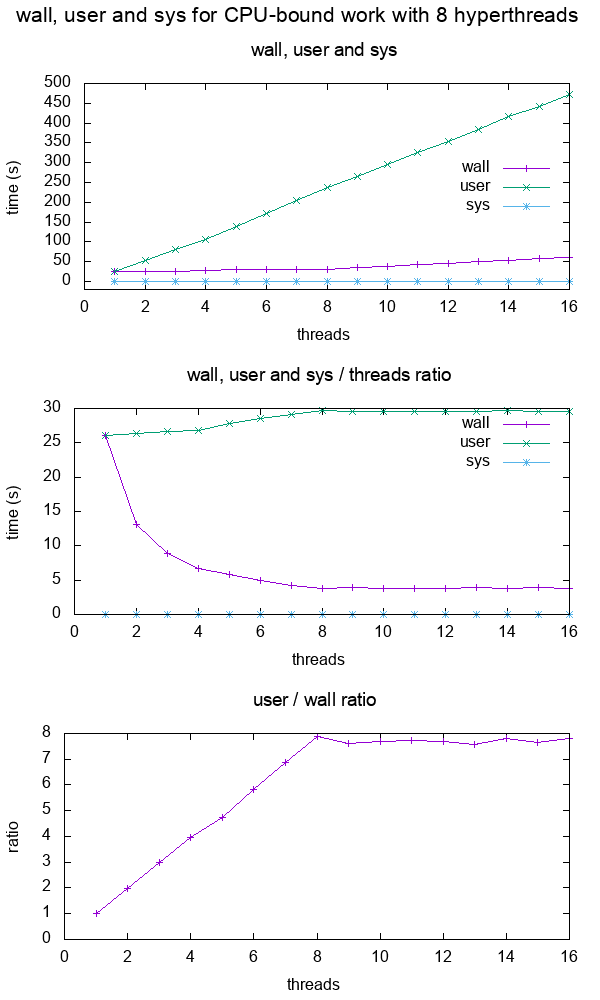
Figure 12. Plot of "real", "user" and "sys" mean times of the output of time for CPU-bound workload with 8 threads. Source. From: What do 'real', 'user' and 'sys' mean in the output of time?+--------+ +------------+ +------+ | device |>---------------->| function 0 |>----->| BAR0 | | | | | +------+ | |>------------+ | | | | | | | +------+ ... ... | | |>----->| BAR1 | | | | | | +------+ | |>--------+ | | | +--------+ | | ... ... ... | | | | | | | | +------+ | | | |>----->| BAR5 | | | +------------+ +------+ | | | | | | +------------+ +------+ | +--->| function 1 |>----->| BAR0 | | | | +------+ | | | | | | +------+ | | |>----->| BAR1 | | | | +------+ | | | | ... ... ... | | | | | | +------+ | | |>----->| BAR5 | | +------------+ +------+ | | | ... | | | +------------+ +------+ +------->| function 7 |>----->| BAR0 | | | +------+ | | | | +------+ | |>----->| BAR1 | | | +------+ | | ... ... ... | | | | +------+ | |>----->| BAR5 | +------------+ +------+Code 5.Logical struture PCIe device, functions and BARs. From: What is the Base Address Register (BAR) in PCIe?
- Electronics
- Raspberry Pi
Figure 13. Raspberry Pi 2 directly connected to a laptop with an Ethernet cable. Image from answer to: How to hook up a Raspberry Pi via Ethernet to a laptop without a router?Figure 14. . Image from answer to: How to hook up a Raspberry Pi via Ethernet to a laptop without a router? Figure 15. . Image from answer to: How to emulate the Raspberry Pi 2 on QEMU? Figure 16. Bare metal LED blinker program running on a Raspberry Pi 2. Image from answer to: How to run a C program with no OS on the Raspberry Pi?
- Raspberry Pi
- Computer security
- Media
Video 2. Canon in D in C. Source.The original question was deleted, lol...: How to programmatically synthesize music?- How to resize a picture using ffmpeg's sws_scale()?
- Is there any decent speech recognition software for Linux? ran a few examples manually on
vosk-apiand compared to ground truth.
- Eclipse
- Computer hardware
- Scientific visualization software
Figure 17. VisIt zoom in 10 million straight line plot with some manually marked points. Source. From: Section "Survey of open source interactive plotting software with a 10 million point scatter plot benchmark by Ciro Santilli"
- Numerical analysis
- Computational physics
- Register transfer level languages like Verilog and VHDL
- Verilog:
Figure 19. . See also: Section "Verilator interactive example"
- Verilog:
- Android
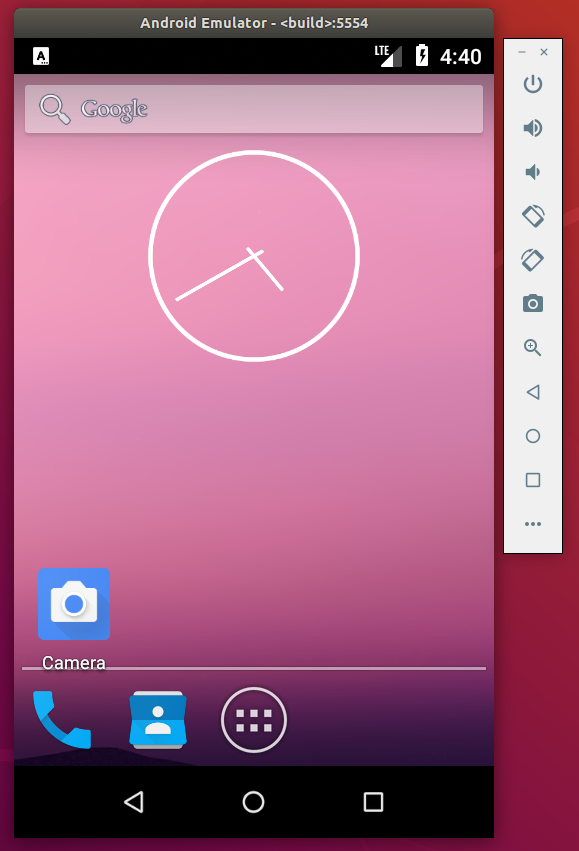
Video 4. Android screen showing live on an Ubuntu laptop through ADB. Source. From: How to see the Android screen live on an Ubuntu desktop through ADB?
- Debugging
- Program optimization
- What is tail call optimization?
Figure 21. . Source. The answer compares gprof, valgrind callgrind, perf and gperftools on a single simple executable.
- Data
Figure 22. Mathematics dump of Wikipedia CatTree. Source. In this project, Ciro Santilli explored extracting the category and article tree out of the Wikipedia dumps.
- Mathematics
Figure 23. Diagram of the fundamental theorem on homomorphisms by Ciro Santilli (2020)Shows the relationship between group homomorphisms and normal subgroups.- Section "Formalization of mathematics": some early thoughts that could be expanded. Ciro almost had a stroke when he understood this stuff in his teens.
Figure 24. Simple example of the Discrete Fourier transform. Source. That was missing from Wikipedia page: en.wikipedia.org/wiki/Discrete_Fourier_transform!
- Network programming
- Physics
- What is the difference between plutonium and uranium?
Figure 25. Spacetime diagram illustrating how faster-than-light travel implies time travel. From: Does faster than light travel imply travelling back in time?
- Biology
Figure 26. Top view of an open Oxford Nanopore MinION. Source. From: Section "How to use an Oxford Nanopore MinION to extract DNA from river water and determine which bacteria live in it"Figure 27. Mass fractions in a minimal growth medium vs an amino acid cut in a simulation of the E. Coli Whole Cell Model by Covert Lab. Source. From: Section "E. Coli Whole Cell Model by Covert Lab"
- Quantum computing
- Section "Quantum computing is just matrix multiplication"
Figure 28. Visualization of the continuous deformation of states as we walk around the Bloch sphere represented as photon polarization arrows. From: Understanding the Bloch sphere.
- Bitcoin
- GIMP
Figure 29. GIMP screenshot part of how to combine two images side-by-side in GIMP?
- Home DIY
Figure 30. Total_Blackout_Cassette_Roller_Blind_With_Curtains.Source. From: Section "How to blackout your window without drilling"
- China
Ciro Santilli's hardware Raspberry Pis Updated 2025-07-26
About the brand: Raspberry Pi
Cosmic ray Updated 2025-07-16
CosmicPI: Detecting Cosmic Rays with a Raspberry Pi by Marco Reps (2021)
Source. How to mine Monero Updated 2025-11-05
Ubuntu 20.10 as per xmrig.com/docs/miner/build/ubuntu:At minexmr.com/#getting_started we see that all you then need is a single CLI command:Seems simple, well done devs!
sudo apt install git build-essential cmake libuv1-dev libssl-dev libhwloc-dev
git clone https://github.com/xmrig/xmrig.git
mkdir xmrig/build && cd xmrig/build
cmake ..
make -j$(nproc)xmrig -o pool.minexmr.com:4444 -u <your-monero-address>Benchmark on Lenovo ThinkPad P51 (2017) as per xmrig.com/docs/miner/benchmark:gives:which according to the minexmr.com mining pool would generate 0.0005 XMR/day, which at the February 2021 rate of 140 USD/XMR is 0.07 USD/day. The minimum payout in that pool is 0.004 XMR so it would take 8 days to reach that.
./xmrig --bench=1M948.1 h/sSo clearly, application-specific integrated circuit mining is the only viable way of doing this.
www.makeuseof.com/cryptos-you-can-mine-at-home/ is a completely full of bullshit article that says otherwise. How can someone publish that!
It is hard to do something useful with a devboard Updated 2025-07-27
In the 2010's/2020's, many people got excited about getting children in to electronics with cheap devboards, notably with Raspberry Pi and Arduino.
While there is some potential in that, Ciro Santilli always felt that this is very difficult to do, while also keeping his sacred principle of backward design in mind.
The reason for this is that "everyone" already has much more powerful computers at hand: their laptops/desktops and even mobile phones as of the 2020s. Except perhaps if you are thing specifically about poor countries.
Therefore, the advantage using such devboards for doing something that could useful must come from either:
- their low cost. This would be an important consideration if you were to mass produce your product, but that is not going to be the case for learners, at least initially.
- their portability, and closely linked their ability to act as sensors
- their ability to act as actuators, which is often missing from regular computers
- them having hardware accelerators that are not normally present in regular computers, e.g. FPGAs or AI accelerators. And then the demo project must demonstrate that the project is able to do something significantly faster/cheaper on the devboard than on a desktop computer.
Program Raspberry Pi Pico W with C Updated 2025-07-26
Ubuntu 22.04 build just worked, nice! Much feels much cleaner than the Micro Bit C setup:
sudo apt install cmake gcc-arm-none-eabi libnewlib-arm-none-eabi libstdc++-arm-none-eabi-newlib

git clone https://github.com/raspberrypi/pico-sdk
cd pico-sdk
git checkout 2e6142b15b8a75c1227dd3edbe839193b2bf9041
cd ..

git clone https://github.com/raspberrypi/pico-examples
cd pico-examples
git checkout a7ad17156bf60842ee55c8f86cd39e9cd7427c1d
cd ..

export PICO_SDK_PATH="$(pwd)/pico-sdk"
cd pico-exampes
mkdir build
cd build
# Board selection.
# https://www.raspberrypi.com/documentation/microcontrollers/c_sdk.html also says you can give wifi ID and password here for W.
cmake -DPICO_BOARD=pico_w ..
make -j
Then we install the programs just like any other UF2 but plugging it in with BOOTSEL pressed and copying the UF2 over, e.g.:Note that there is a separate example for the W and non W LED, for non-W it is:
cp pico_w/blink/picow_blink.uf2 /media/$USER/RPI-RP2/cp blink/blink.uf2 /media/$USER/RPI-RP2/Also tested the UART over USB example:You can then see the UART messages with:
cp hello_world/usb/hello_usb.uf2 /media/$USER/RPI-RP2/screen /dev/ttyACM0 115200TODO understand the proper debug setup, and a flash setup that doesn't require us to plug out and replug the thing every two seconds. www.electronicshub.org/programming-raspberry-pi-pico-with-swd/ appears to describe it, with SWD to do both debug and flash. To do it, you seem need another board with GPIO, e.g. a Raspberry Pi, the laptop alone is not enough.
Universal asynchronous receiver-transmitter Updated 2025-07-16
A good project to see UARTs at work in all their beauty is to connect two Raspberry Pis via UART, and then:
- type in one and see characters appear in the other: scribles.net/setting-up-uart-serial-communication-between-raspberry-pis/
- send data via a script: raspberrypi.stackexchange.com/questions/29027/how-should-i-properly-communicate-2-raspberry-pi-via-uart
Part of the beauty of this is that you can just connect both boards directly manually with a few wire-to-wire connections with simple jump wire. Its simplicity is just quite refreshing. Sure, you could do something like that for any physical layer link presumably...
Remember that you can only have one GNU screen connected at a time or else they will mess each other up: unix.stackexchange.com/questions/93892/why-is-screen-is-terminating-without-root/367549#367549
On Ubuntu 22.04 you can screen without sudo by adding yourself to the
dialout group with:sudo usermod -a -G dialout $USER